I came across this blog post from Mary Corbet and thought she had some really interesting ideas regarding thread management which she explains in relation to a project she’s working on.
The first idea I’ve really taken to is the one regarding storage of the thread from the kit needed to complete the project. You can read her idea for yourself below but, essentially, she decided to store the threads in clear zip lock bags so she could see the colours straightaway. She has marked each bag with the DMC colour reference in the top right hand corner – and the extra clever bit, is that she has stored them in numerical order on a ring by punching holes into a corner of the bag. So she has created a kind of carousel effect and can then easily flip through the bags until she finds the one she needs next. Until now, I have stored my skeins of floss in small brown envelopes – albeit with the numbers written in the corner – but I really like the notion of having the colours immediately visible so I may well be updating my thread storage in the not too distant future.
Here’s Mary’s blog post so you can read it for yourself:
Earlier in January, we looked a stitching project that’s in my project rotation for 2017. It’s this miniature Tree of Life tapestry kit designed by Natalia Frank. The piece is worked on 56 count silk gauze, using silk threads – some 89 glorious colors of silk!
I showed you how I set the project up here, and today, I’ll show you progress on it and chat about getting my “stitching legs” on this one. I think it took me a lot longer than it takes most people to get their sea legs!
As I started the piece, cheerfully making mistakes along the way, I slowly mapped out a sensible strategy for stitching it that would reduce the chance of my making future similar mistakes. I also decided to take a different approach with thread organization. And I applied some of the typical stitching strategies that I use, no matter what project I’m working on.
Let’s take a look, shall we?
Many small counted projects start in the middle of the design and work outwards, using the “cross hairs” (the center lines, horizontal and vertical) on the chart to show you exactly where the center of the piece is, and then allowing you to count from those center lines outwards.
On larger pieces that involve many pages of charts, it makes more sense to start on an outside corner. To do this, you have to work out the boundaries of the project – the number of stitches both vertical and horizontal that comprise the very edge of the project all around.
In this case, I counted the little squares in the silk gauze and marked the corners that would contain the design area with a tiny micron pen.
Starting in the Lower Corner
I began stitching in the lower left corner, because it was simply more convenient. In fact, it might be better to start stitching this type of thing at the top somewhere, so that your arms aren’t tempted to rest on already-stitched areas as you work up from the bottom. But I figure I can cover the stitched areas with tissue paper if I need to.
One reason it’s easier for me to start at the base of a frame is that the base is closer to me. I stitch without my glasses on and without magnification, and I can see it best, closer.
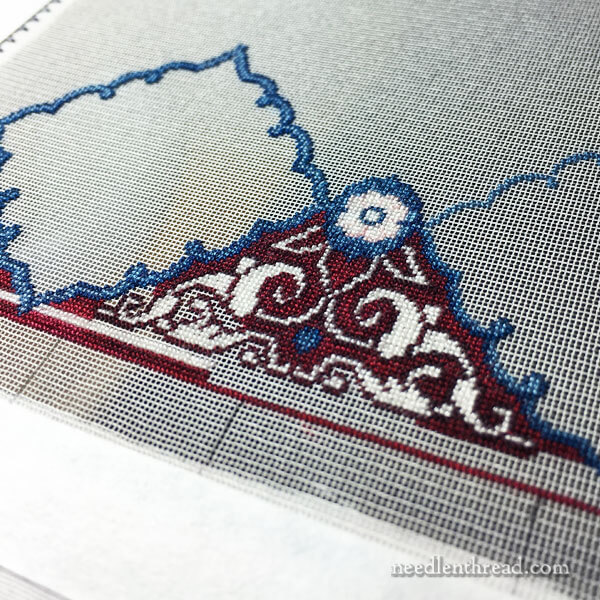
In starting out, it took me a while to get into the swing of counted work again. I began by working the blue scrolly frame element in the corner and some of the decoration around it.
I managed to make a few counting mistakes as I went. Fortunately, none of them were in the structure of the overall piece – they were just within the design area where I was working, without pushing the whole piece’s structure out of whack. Therefore, I left the mistakes. They’re so tiny, they aren’t really noticeable. I’m pretty sure I’m the only one who could find them, if pressed.
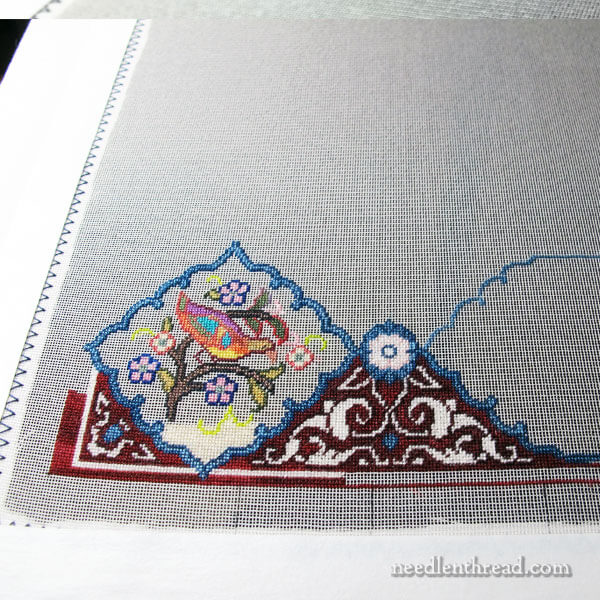
Once I finished the first corner frame and some of the embellishment around it, I decided to jump in and do the bird that goes in that corner.
And this is what I really like about this whole piece – the variety is pretty amazing! If I get bored with working in one area, I can move to another. I was a little bored with working the frame, so I jumped into the bird medallion in the corner.
Relatively speaking, these little colorful bird bits work up pretty quickly. And they’re very satisfying.
But notice that I didn’t finish it. I didn’t quite get the background in, and there’s a reason for that. I’ll tell you in a minute.
After many hours’ labor (it really isn’t labor!) on the beginning of the frame and the little corner bird, I decided to move on to the lower panel on this piece, which is an elongated inset of mountains, a dog, a rabbit, flowers, grasses, tree and sky.
There are lots of little design elements within each inset in the frame on this whole piece, and I really like that fact, because it keeps things interesting.
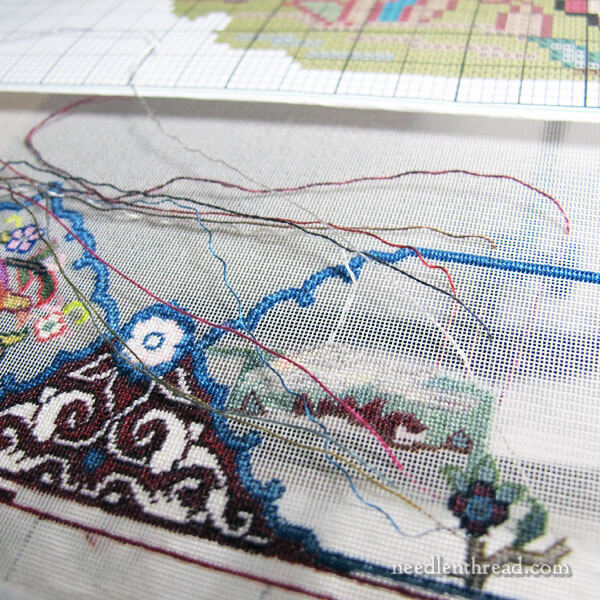
Parking Threads
At the same time, the whole thread-changing thing can be a drag. So I park my threads and swipe them out of the way. Instead of turning the frame multiple times to end threads, I just end a bunch of them at one time, usually at the end of a stitching session…
…or when I get tired of the build-up of parked threads!
Changing My Strategy
During the stitching of this panel on the frame, my approach to the rest of the project changed drastically.
At first, I thought I would stitch one area of the frame at a time, and then the inset scene inside that part of the frame. Then I’d move on to the next area of the frame.
I realized it would make a whole heck-of-a-lot more sense to stitch all the blue scrolly frame parts and have them finished. That way, I’d have the entire structure of the piece worked out already, and then it was just a matter of filling in designs either in the insets, or in the decorative part of the frame, leaving the center field (the largest “picture” on the piece) for last.
Changing My Thread Arrangement
The other decision I made was in the arrangement of the threads.
For the panels and the central field, the thread in the kit was arranged on a large card with holes punched and numbers next to the holes and in numbered plastic bags.
Each time I had to change colors, I scanned the large card for the number and fumbled through all the plastic bags, until I found it. The colors on the chart don’t necessarily correspond with the color of the floss. The chart is designed with a DMC color scheme (because that’s what most designer programs provide), but the silk substitutions are often very different colors indeed. So I couldn’t use my eyes to find the brownish color I saw on the chart, because chances are, that symbol on the chart really represents a purple in the silk.
It took me a while to get used to that and to figure out a different way to arrange the threads so that I could find the thread I wanted more easily.

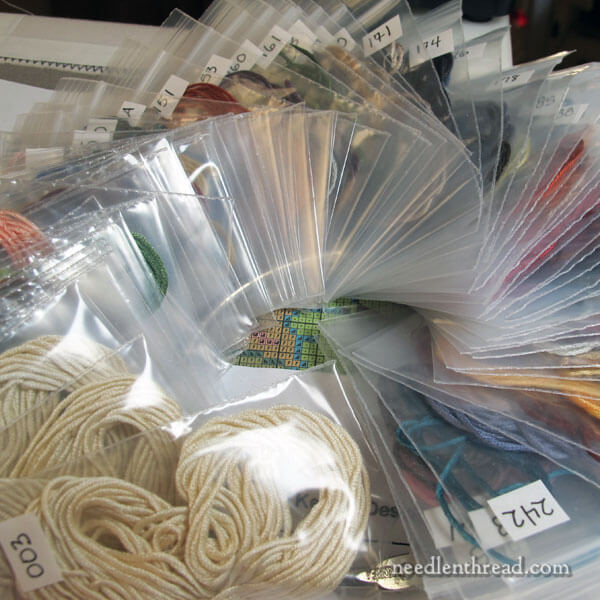
As you can see in the picture, I decided to repackage the threads, putting all the threads on the card and all the threads in the bags into smaller individual zip lock bags, all the same size, and numbering them in the outer right corner of the bag. I punched holes in the corners of the bags, and strung them in numerical order on a large ring.
This way, I can hang the ring on my stand, and when it’s time to switch colors, I just flip through the numerically ordered bags right to the color I need.
All the threads are held fairly compactly on the ring and in one place, making it easier to clean up at the end of a stitching session, too.
Click here to read the original article: http://www.needlenthread.com/2017/02/56-count-strategies-for-stitching.html
I was glad to find I’m not the only person who has trouble distinguishing between brown and purple – especially in artificial light! So I’m looking forward to saving time and effort using Mary’s strategy very soon.
Thread Management – Some Ideas is available on Crafty Bug's Sewing Blog
No comments:
Post a Comment